Medieval fabrics were made out of natural resources. These include linen, wool, cotton, and silk. Natural fabric or blends (linen/cotton) breathe better than plastic fabrics (polyester, nylon, spandex, rayon). This means a cotton dress will be much cooler than a polyester dress on a hot summer day. The natural fabrics also hang differently on the body and have a tendency to shrink when washed. To keep things simple, you may want to stick with cotten or use a blend or linen/cotten and a plastic fabric. These will be easier to find and cheaper than many all natural fabrics.
The colors used depend on your location and time period. In general, colors were made from plants and clays so hot pink and the other day-glo colors were not used. However, plant dyes can produce some very vibrant colors. (Only the poor had to wear muted earth tones and even then they were likey to have something colorful for festivals).
|
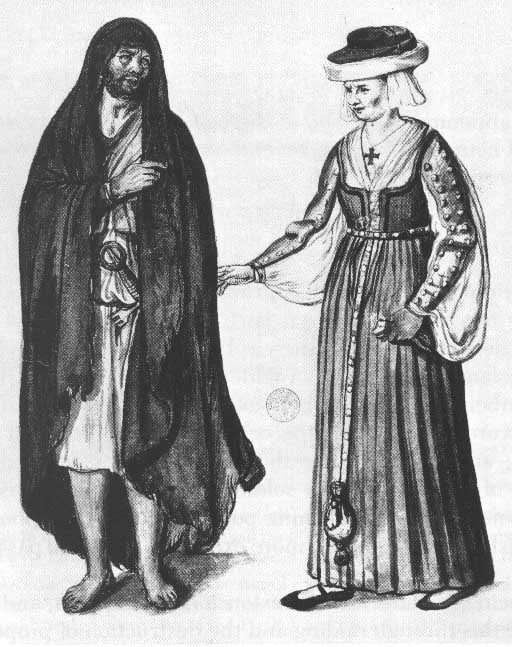
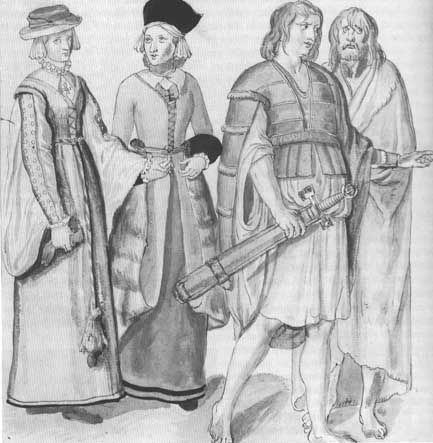
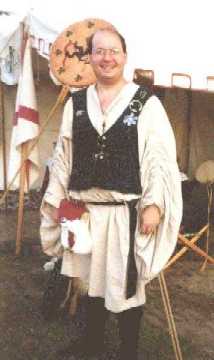
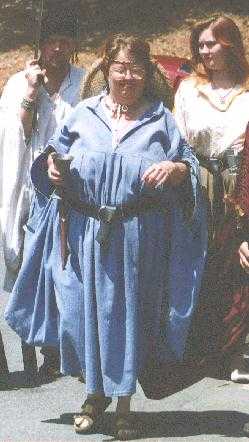
| (Lucas de Heere, a Dutch painter 16th C) The man in the left picture is wearing a belted leine and the bratt, a blanket-like cloak. The woman in the left picture (& on the left of the right picture) is wearing a leine and an overdress. The overdress has sleeves that lie on top of the leine sleeves, open so as to let the leine sleeve hang down. In the right picture, the rightmost man is wearing a bratt - and presumably a leine under it - while the left man is wearing the leine and an ionar (jacket). |
|
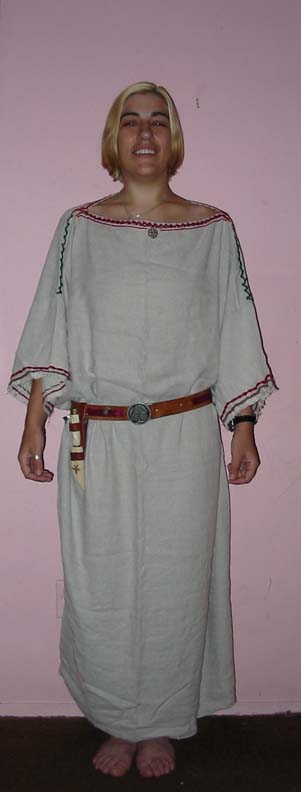
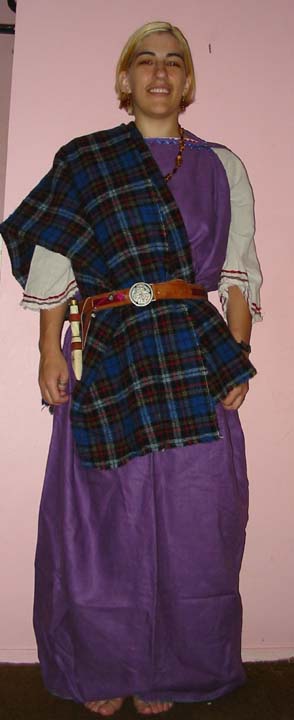
A leine: 2 rectangular panels from your neck down to your knees or ankles. 2 rectangules the length of your arm and twice as wide as you want the arms to be (for the front and back of the sleeve) (no curves or fitting needed at the armpit). Sew shoulder side of sleeves to side of body rectangle at the shoulders. Sew from sleeve wrist to armpit to ankle. Sew some of the neck hole closed. This is exactly as simple as it sounds. It produces a big T.
A peplos: 2 rectangles down to your ankles. Sew the sides from under where the sleeves join your leine on down to the floor. Sew enough of the top to keep it on your shoulders.
A brat: rectangle of warm fabric (usually wool like) big enough to wrap around you or drap over your shoulder and tuck in your belt.
An ionar: looks just like those modern women's vests. Loose. Either use a women's vest or guess at a loose pattern and go for it.
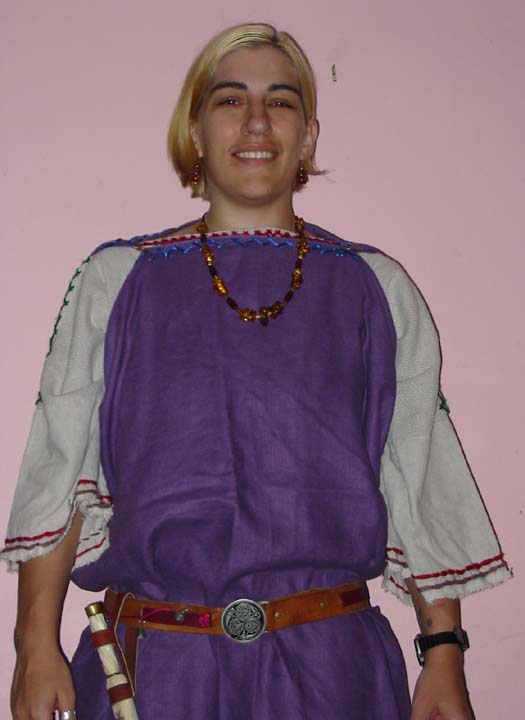
A slightly complex leine.
Info on early irish garb.
Put on trim (strips of hemmed fabric or trim which looks woven from the fabric store) over your seams, on necklines, wrists, ...
 |
 |
 |
| Early Leine | Early Leine, Peplos | Early Leine, Peplos, Brat |
 |
 |
 |
| Later Leine, Ionar | Later Leine | Leine, Overdress, Brat |
T-Tunics: 2-4 yards of fabric.
Lay out the fabric so that the "face" is up. The face is the side of the
fabric that you want on the outside (some material is obvious, others with
take a minute, and still others, it just doesn't matter). Fold your fabric
lengthwise in half. (Lengthwise would be the side that is longest in most
cases.) You need to decide how long you want your tunic to be: here is a
very rough, general guide for men.......
500 CE through 1066 CE tunic ends above or at the knees.
1066 CE through 1325 CE tunic will get longer the later in the range
that you go.
1325 CE through 1400 CE tunic will either just cover your groin, or
it will reach the floor.
Now that you have your length, fold your fabric widthwise (opposite the fold you just made). Now you will need your scissors. BUT, don't cut yet, keep reading. Decide how much room you want in your tunic for you. This will determine how far you will cut. If you want a good guideline, take a shirt that feels comfortable on you, and fold it widthwise and lay it on your fabric. Mark where the armpit of the shirt is on your fabric. Now, move to the open length side of the fabric, determine how much room you need for your arms, usually about 6-9 inches, and cut across until you almost reach the mark for your armpit. Start to curve your cut downward, and around, keep curving, and keep cutting, at an angle, until you reach the bottom open lengthwise edge (the same edge you started this cut on, only at the "bottom" of the fabric).
To prevent the T-Tunic from hanging oddly at the sides: from the "bottom" "inside" (folded) edge of the fabric, cut a slight upward curve from this point to the outside edge. This curve should be about 1 inch of "rise" for every 1 foot of length on the tunic. So if you made a T-Tunic that is about 3 feet long, the curve in the bottom of the tunic should be about three inches.
Now you will need to cut the neck. Start at the "top" "inside" (closed lengthwise) point, and measure no more than three inches in both directions! Three inches will give you a 12 inch hole, do not exceed three inches unless you absolutely have to. Now cut from mark to mark in a nice even curve. Keep this piece of fabric you just cut out! Keep it folded exactly as it is. We'll refer to this as the neck-piece in a moment. Now, take a piece of fabric you cut out from the underarm and fold it the same as you folded your original piece. Place the neck-piece on the newly folded piece matching folded corners to each other. Cut around the neck-piece. Discard the two neck-pieces. On the piece you just cut, measure two inches or so out each edge, and cut following the same curve as the inside cut. You should now have an "O" of fabric. Sew this into the original neck hole you cut into your tunic, matching faces of the fabric to each other. You are now ready to sew up the rest of the open edges (except the bottom and the wrists, of course). You should now have a T-Tunic. If you want, you can finish the ends of the sleeves and the hem (bottom) of the tunic. Remember: ZigZag, and other neat stitches the sewing machine can do were not period. If you want to use these, make sure they are not visible when the garment is worn.
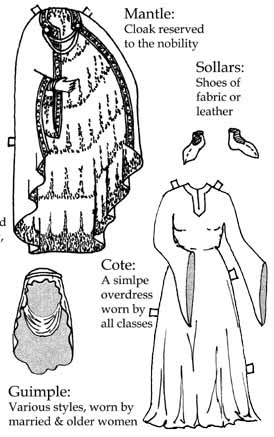 |
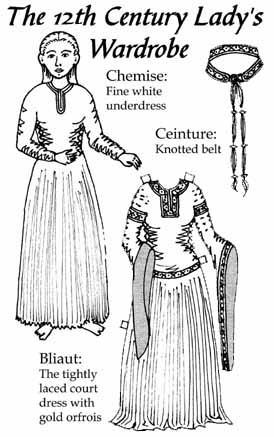
By the 12th C, the crusades happened and silk appeared for the rich.
Gowns for women and men were suddenly side laced and tight fitting.
Many were wrinkled like those skirts you tie in a knot to store. The
gown to the left are for older more conservative women or for everyday wear.
The one to the right is for younger women or fancy occaisions. Men also wear
the bliaut in a knee-length version without the drapey part of the sleeves.
The cote is a simple slightly fitted dress with big sleeves from the elbows on down. It can be made by taking shuolder, bust, waist, and hip measurments. Adding a few inches for seams and a few more for non-skin tightness. The sleeves were attached at the bicep (no curve shoulder seams) and flair out after the elbow. The bliaut is a more complex outfit and attempters should already know some costuming to try it. See my page for some patterns. It could be faked using a broomstick skirt and a long sleeve shirt of the same fabric. Sew together at the waist. Slit the shirt sides and sew on lacing tape from bust to hip. (Fabric strip with eyelet holes already in it. Put trim over the waist seam. Sew trim where the arm seams should have been. Slit the neck a bit down the front. Add trim on the neck. Then find similar fabric (different color would be ok) and make triangles to add on to the wrists with the long side open. The men's version doesnt seem to have the trim on the hips and would be harder to make this way. |
 |
A viking man could do a poofier tunic than the english with crazy striped poofy pants and a big belt. Its the same t-tunic construction but wider.
|
A women's apron dress is like a tube dress with a wider skirt and straps going over the shoulders and pinned onto the front. A chemise is worn under it. (A chemise looks just like a tight-sleeved t-tunic or a night gown. since only the top part shows, you could use a shirt with any skirt to get the right dress poofiness.) Measure:
If your bust measument + 1 < 45 inches, go with 45 inch wide fabric. Otherwise go with 60 inch fabric or buy 45 inch and adjust your cutting out so all the pieces fit. |
|

|
Here's the cutting layout

|

Sew the pieces together in the order thats shown. Then make/buy/find two strips of fabric to attach to the front of the dress and sew them to the back. The front gets pinned on. Big brooches work well for this. You put on the dress by squirming into it. If you made it wide enough, this should not be a problem and the straps will be needed to keep it up. Trim the dress as you like but...special viking custom. Load the sewing machine with a thread which will stand out on your fabric and trace the outside of each seam with sewing. (So, each seam has 2 colored lines, one on each side of it). Visible seams! Big amber jewelry and some stone necklaces and fine metal work go with this. You show your wealth in jewelry.